تسجيل الدخول بحساب linkedin في لارافيل بإستخدام حزمة socilite
في مقال سابق تم شرح كيفية إتاحة ميزه إنشاء حساب / تسجيل الدخول بواسطة حساب جوجل، في هذا المقال سيتم شرح كيفية إتاحة هذه الميزه بإستخدام حساب لينكد إن. وذلك بإستخدام الحزمة Socialite التي يوفرها إطار العمل لارافيل؟
حتى نتمكن من إضافة ميزة تسجيل الدخول / إنشاء حساب بواسطة شبكة لينكد ان، يجب علينا الحصول على client id, secret id.
إعدادات لينكد ان
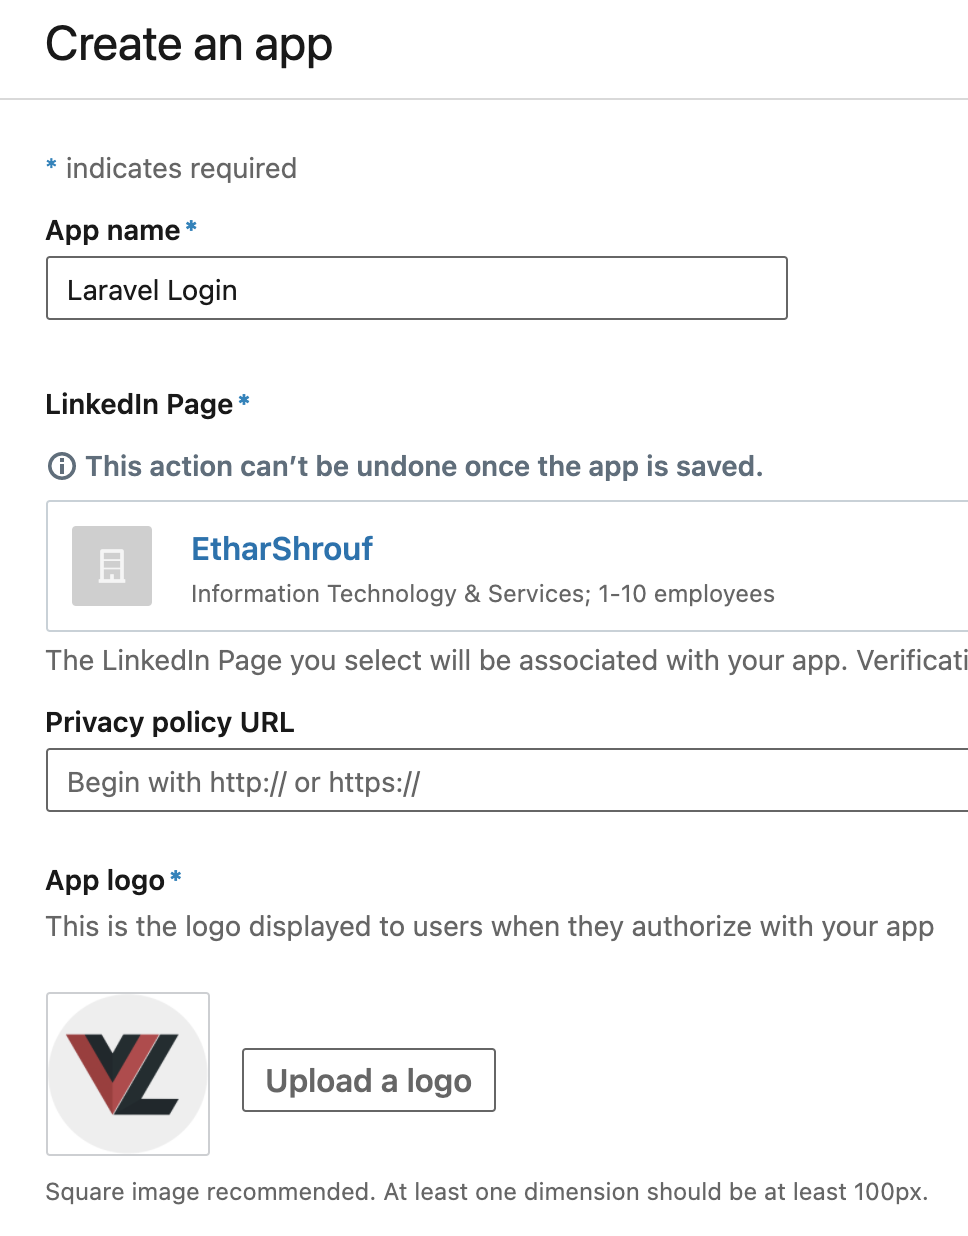
الذهاب إلى Linkedin Developer Console وإنشاء تطبيق https://www.linkedin.com/developers/apps/new
- حيث يجب تعبئة إسم للتطبيق.
- إضافة رابط للصفحة على لينكد إن، ويمكن إنشاء صفحة جديدة.
- إضافة شعار حيث إن هذا الشعار سيظهر عند تسجيل الدخول.

- ننتقل إلى التبويب auth ومن هناك نحصل على app_id, secret_id
- إضافة رابط التطبيق / الموقع

- ننتقل للتبويب Porducts ونفعل خيار Sign in with linkedin

يتطلب تفعيل هذا الخيار بعض الدقائق فقط.
وبذلك نكون قد إنتهينا من اعدادات Linkedin وحصلنا على app_id, secret_id
إعدادات لارافيل
إعدادات لارافيل هي متشابهه في جميع المواقع
تثبيت حزمة socialite
composer require laravel/socialite
إضافة linkedin driver في الملف service.php
'linkedin' => [
    'client_id'     => env('LINKEDIN_CLIENT_ID'),
    'client_secret' => env('LINKEDIN_CLIENT_SECRET'),
    'redirect'      => env('LINKEDIN_REDIRECT')
],
إضافة قيم المتغيرات client_id,secret_id,redirect في الملف .env
LINKEDIN_CLIENT_ID=787hfasdfdaszgar3oklvd
LINKEDIN_CLIENT_SECRET=yhbYPDfadsfdasWQ1fDQAefS
LINKEDIN_REDIRECT=http://127.0.0.1:8000/callback/linkedin
إضافة ServiceProvider في الملف config/app.php
'providers' => [
    /*
     * Package Service Providers...
     */
    Laravel\Socialite\SocialiteServiceProvider::class,
]
إضافة Facade في الملف config/app.php
'aliases' => [
    ...
    'Socialite' => Laravel\Socialite\Facades\Socialite::class,
]
إضافة الحقول social_id, social_type إلى ملف user migration
php artisan make:migration addSocialToUsers
public function up()
{
    Schema::table('users', function ($table) {
        $table->string('social_id')->nullable();
        $table->string('social_type')->nullable();
    });
}
تنفيذ migration
php artisan:migrate
التعديل على User Model
protected $fillable = [
        'name',
        'email',
        'password',
        'social_id',
        'social_type'
    ];

    /**
     * The attributes that should be hidden for arrays.
     *
     * @var array
     */
    protected $hidden = [
        'password',
        'remember_token',
        'two_factor_recovery_codes',
        'two_factor_secret',
    ];

    /**
     * The attributes that should be cast to native types.
     *
     * @var array
     */
    protected $casts = [
        'email_verified_at' => 'datetime',
    ];

    /**
     * The accessors to append to the model's array form.
     *
     * @var array
     */
    protected $appends = [
        'profile_photo_url',
    ];
إضافة route في ملف web.php
Route::get('auth/linkedin', [LinkedinSocialiteController::class, 'redirectToLinkedin']);
Route::get('callback/linkedin', [LinkedinSocialiteController::class, 'handleCallback']);
إنشاء LinkedinSocialiteController ووضع الدوال redirectToLinkedin, handleCallback
php artisan make:controller LinkedinSocialiteController
class LinkedinSocialiteController extends Controller
{
    public function redirectToLinkedin()
    {
        return Socialite::driver('linkedin')->redirect();
    }

    public function handleCallback()
    {
        try {
            $user = Socialite::driver('linkedin')->user();
            $finduser = User::where('social_id', $user->id)->first();
            if($finduser){
                Auth::login($finduser);
                return redirect('/home');

            }else{
                $newUser = User::create([
                    'name' => $user->name,
                    'email' => $user->email,
                    'social_id'=> $user->id,
                    'social_type'=> 'linkedin',
                    'password' => encrypt('my-linkedin')
                ]);
                Auth::login($newUser);
                return redirect('/home');
            }
        } catch (Exception $e) {
            dd($e->getMessage());
        }
    }
}
إنشاء صفحة login وإنشاء route لها ووضع زر التسجيل بواسطة لينكد ان بداخلها
<a href="{{ url('auth/linkedin') }}">
    <strong>Linkedin Login</strong>
</a>
مسح الكاش
php artisan cache:clear
الأن بعض الضغط على زر تسجيل الدخول بواسطة Linkedin ستظهر نافذه تسجيل الدخول لحساب linkedin وبعد وضع المعلومات بالشكل الصحيح ستظهر شاشه كما بالأسفل، تحتوي على شعار التطبيق، صوره البروفايل، وطلب صلاحية للحصول على البريد الإلكتروني، والإسم، وبالضغط على allow يتم تسجيل الدخول.
